
Ok y’all, so I’m addicted to Shiplap. I mean, I was before…but after finding the method I’m going to share with y’all today, it’s a hopeless addiction! If you follow me on Instagram and/or Periscope, you’ve already had some inside views of my project.
This year on my blog I’m committed to bringing y’all projects with bang for your buck! Like, cheap price with expensive looking outcome. Everyone wants a beautiful home, and there’s absolutely no reason to break the bank to have one.
Since I have a passion for Shiplap, it’s the first “Bang for your Buck” tutorial of the year on my blog! Are you ready? I’m seriously so excited to share this with you!!
What you’ll need:
Sheet(s) of 4×8 plywood underlayment (more on that below)
A brad nailer or nail gun and nails for it
Two nickels
A level
A measuring tape
A miter saw
Medium grit sanding sponge
Paint (or stain) depending on how you are finishing the Shiplap

I bought my Underlayment at Home Depot. It comes in 4 foot by 8 foot sheets, and I had them cut it down into 4.5″ strips. Y’all, full sheets are like $11 each!!! I told you… CHEAP. If you use the same measurements I did, you will get 10, 4.5″x96″ strips out of each sheet. You’ll want to measure your wall ahead of time to find out how many sheets you’ll need!
I’m going to go ahead and include the video here of how to hang the Shiplap for those of you that are visual learners! (I’m a hot mess in it y’all, just a warning!!)
For those of you that would rather read your instructions, here we go! (You can paint your strips before or after hanging them… I tried both ways and think I prefer after since I found I had to go back and touch up areas on the pre-painted pieces anyway)
You’re going to take each piece of 4.5″x96″ “wood” and quickly sand the edges with a medium sanding sponge. It doesn’t have to be perfect y’all, just get the splinters off the sides. (You’ll need two people for this next part, the strips are too long to keep even on the wall on your own!) Now you’re going to start at the top of the wall butted up to the ceiling and use your level along the bottom of the strip to make sure it’s level on both ends. Once it’s level, take your brad nailer, starting at one side, and start nailing! I did two nail holes (one at the top of the strip and one towards the bottom) each time I nailed. Move a couple feet down and repeat nailing again. Do this all the way down the board. Once your first board is up, butt the next board up to its side, and after making sure it’s level, repeat the nail steps.

After you’ve completed one strip on the wall, you’re going to start your second row. Same method as above, except this time you’re going to use you nickels as spacers in between the boards so you have the same spacing down your entire wall. You put one nickel at one end, and the other at the end your Shiplap partner is holding! Check with your level to make sure you’re still even, and keep nailing like you did the row above. I wanted random seams on my wall, so as I did each row, I made sure to keep pieces different lengths. (This is where the saw came in).
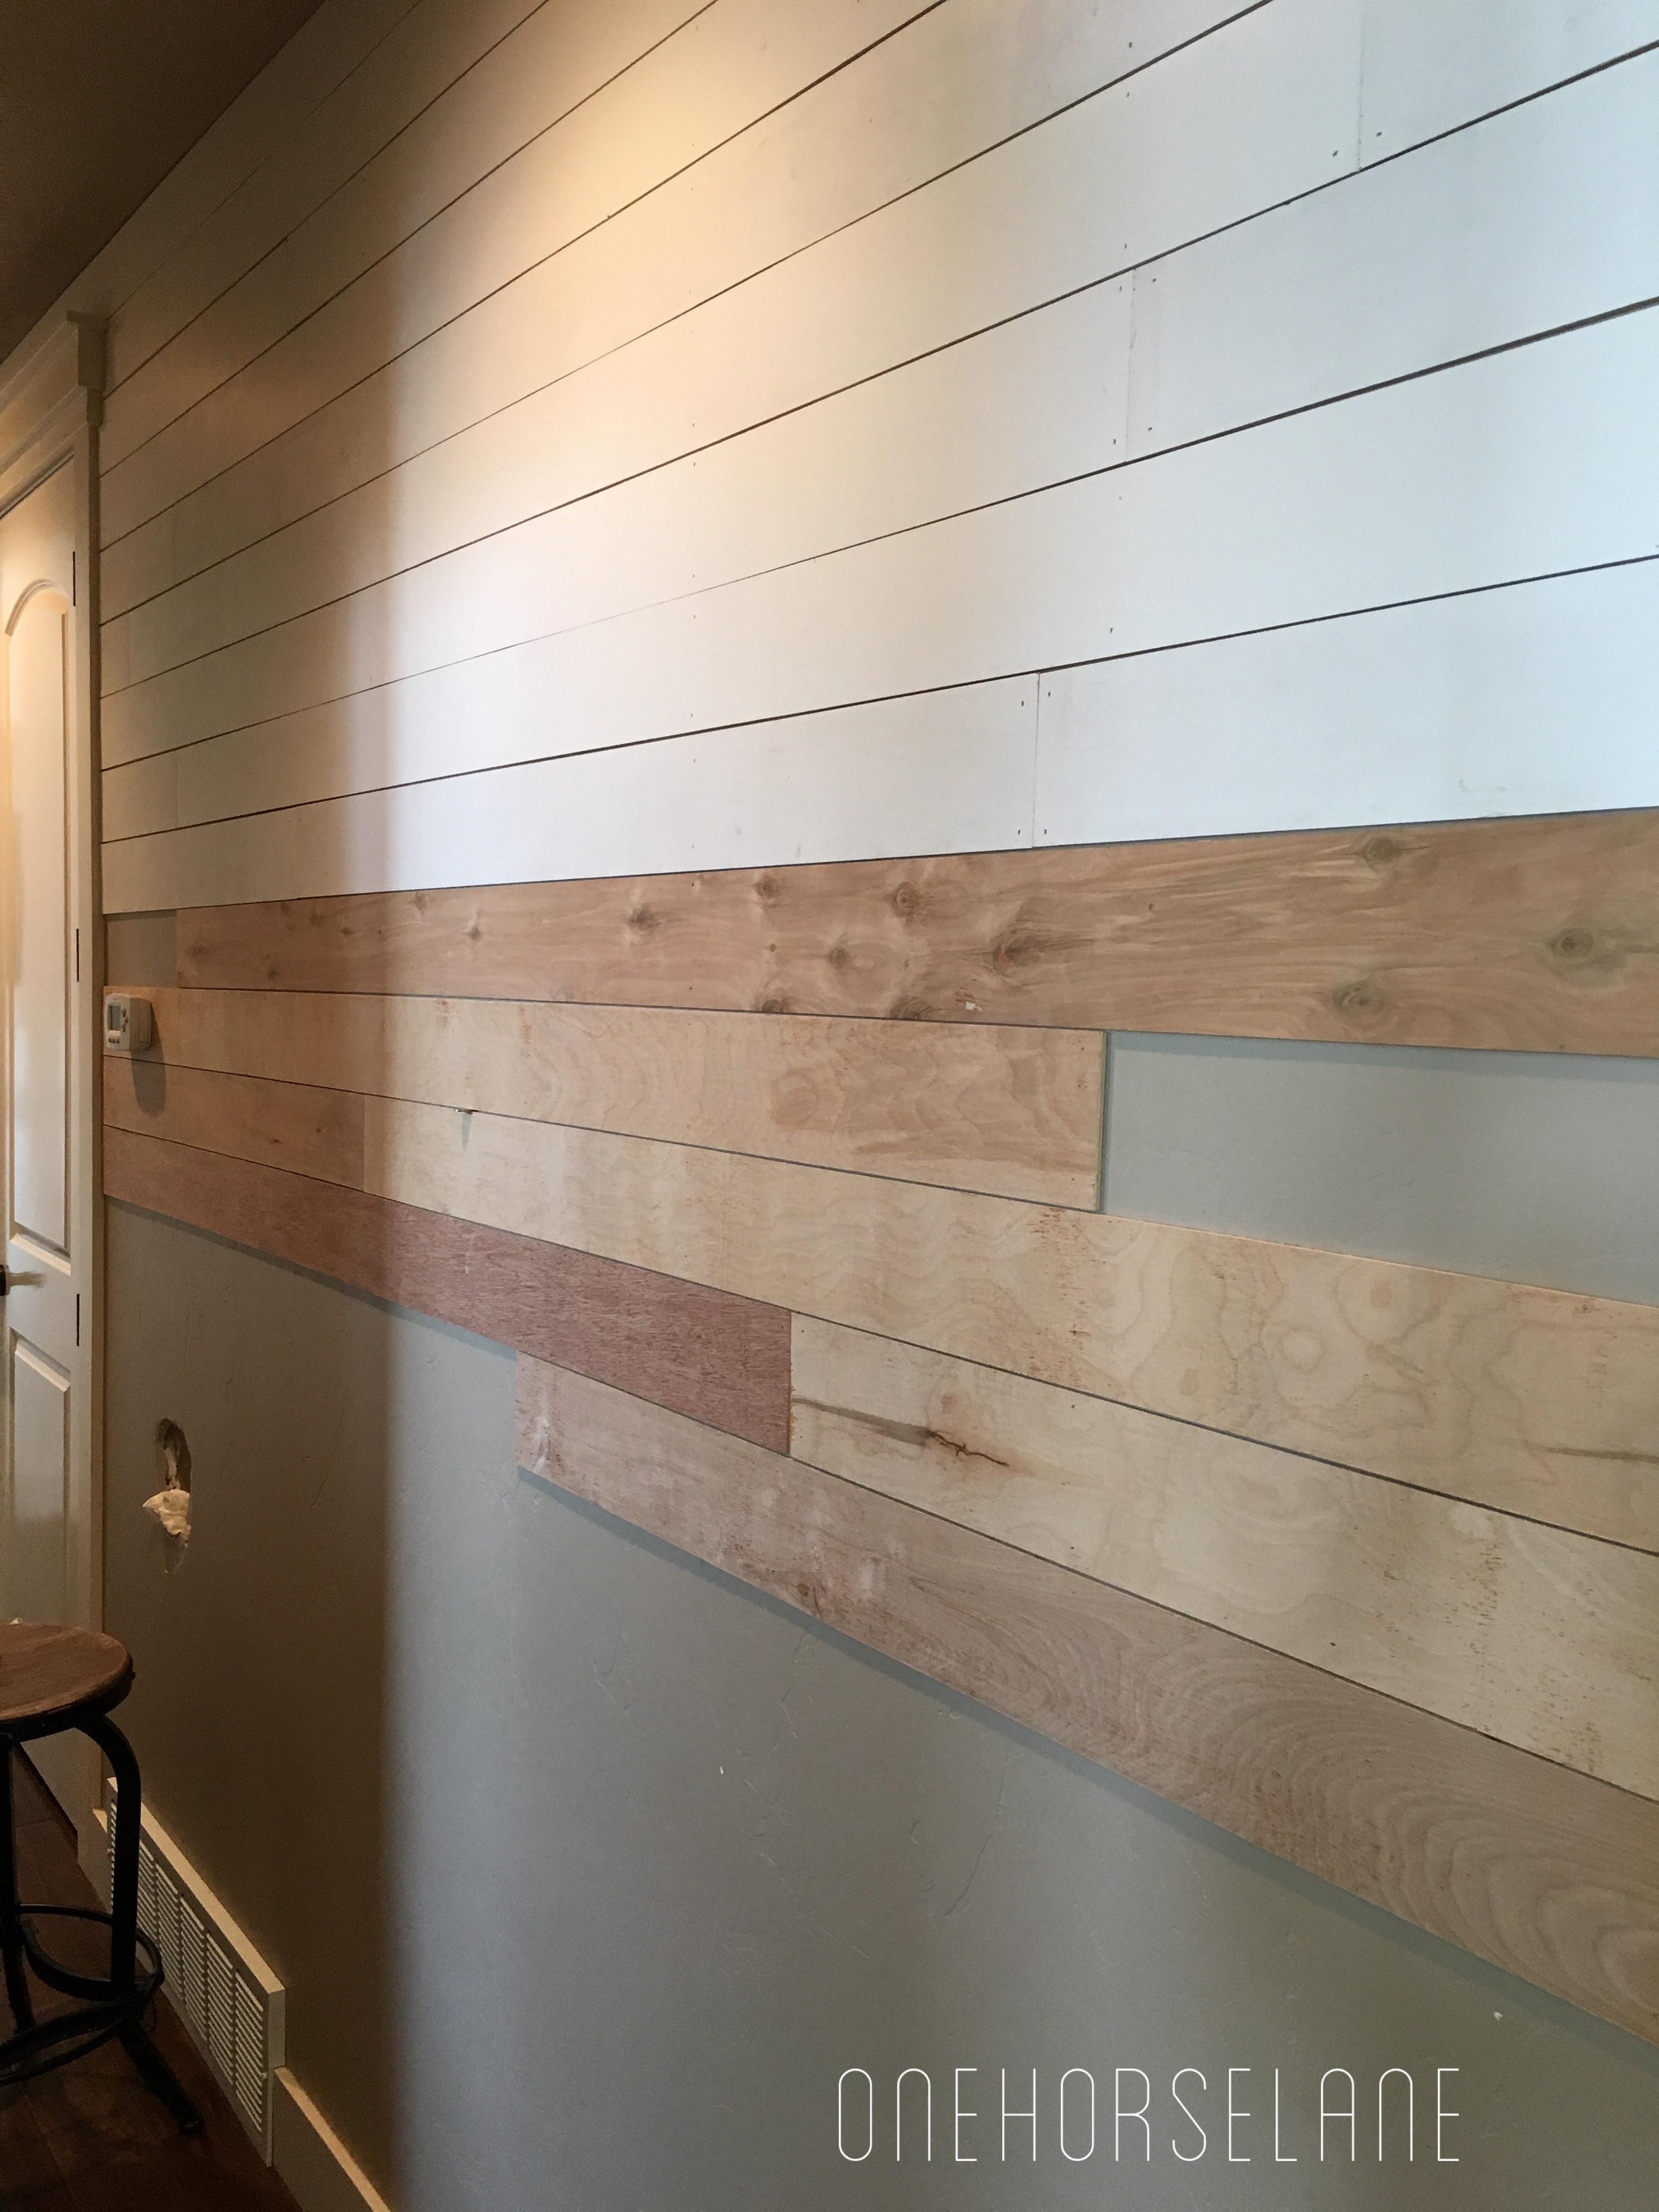
See that hole in the wall?? It’s the size of a human head… A little too much rough housing in my house?!! It’s the hole that inspired this wall to be my first Shiplap wall project. Thank you, hole.
You’re going to continue the same process until you have your “hole” wall covered! (See what I did there?? Lol)

Hole Be Gone!! Now just keep going!
 And before you know it, you’ll have this!!
Finishing your wall and an important paint tip coming tomorrow in Part 2!
Hope this has been helpful for y’all!! I’d love to see/hear your experiences or plans to build your own Shiplap wall… Or answer any questions y’all have!! Thanks for joining me! Have a blessed day!!
Much love,
Heather

Is there a Part 2 to this tutorial? Thanks!
LikeLike
Yes. I have a new blog website, it’s http://www.onehorselane.com … part 2 is there along with all of my current and future blog posts. I’d love to have you come follow along 🙂
LikeLike